 It involved learning how to work with fondant to use it as a frosting for a cake and also how to decorate with it.
Topics covered included how different coloring agents affect the fondant. For example, if you use a dry powder the fondant can achieve a marbled effect whereas if you are using a liquid gel a solid colour will be the result.
Getting the fondant to be workable usually means kneading it like bread if you are starting with a large quantity and then treating it a little like pie dough to roll it out. Remember to use something like cornstarch underneath so that it won't stick like glue to the work surface.

Here is the fondant being rolled out by one of the students. There are fancy machines (really pricey too) that can do this for you which is great if you are frosting many, many cakes but rolling it by hand works pretty darn well too.

Here are pictures of the students covering the cake and working out the folds so that the cakes have a smooth surface.

Cutting some decoration.
 Fondant is a lot like playing with Play dough. You can cut shapes out, mold it into other shapes, basically just have fun playing with it.
A very small amount of water applied to the decoration and/or the frosting surface will help the decoration stick.


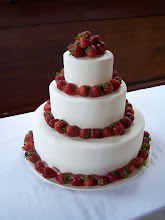
 Decorations are applied, just needs some finishing touches and a bottom edge to give it that finished look.
Some close up cake action.
There are different varieties of fondant and several recipes to make your own as well. If you are working colour into a fondant, try doing it with a small amount of fondant first because not all fondants take colours the same way.
And here are the students with their finished cakes.
We'll be offering some more classes in the future so keep an eye on the facebook/twitter accounts for updated information or you can call the bakery as well.
No comments:
Post a Comment